Mary Berry’s Victoria sandwich cake from her Cookery Course (2015) is the Master Recipe in her baking chapter: 225g each of butter, caster sugar, self-raising flour, four large eggs, and 2 teaspoons of baking powder, baked at 180°C/fan 160°C for 20–30 minutes in two 20cm loose-bottomed sandwich tins.
What makes this the “Master Recipe” in Mary Berry Cookery Course: A Step-by-Step Masterclass in Home Cooking (2015) is the set of “Key to Success” notes Berry attaches to every stage. She explains that the tins must be greased evenly, because “the cakes will not rise properly” if there are dry patches. She flags that over-mixing is a risk, and gives a precise signal for when the batter is ready: “The mixture will be soft enough to drop off the beaters when you lift them up.”
The single technique Berry emphasises above all else in this version is reading the batter, not the clock. The bake window runs from 20 to 30 minutes, a wider range than in her other books, because Berry acknowledges that all ovens vary. The shrink-away test, watching the sponge pull from the tin sides, combined with the spring-back test give two checkpoints so you catch it at exactly the right moment rather than relying on a fixed time.
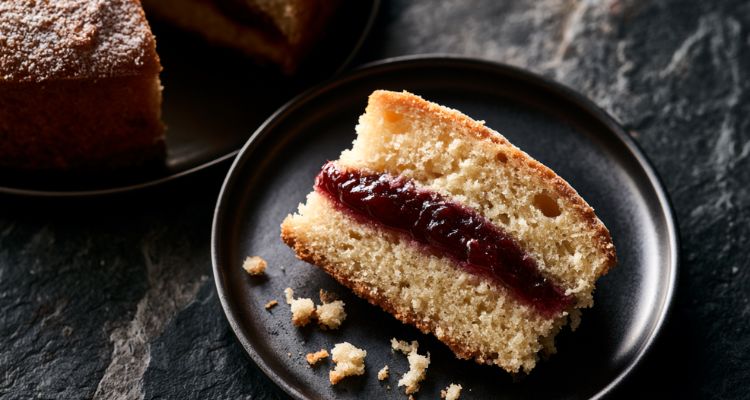
Mary Berry Victoria Sandwich Cake Recipe
Course: DessertCuisine: BritishDifficulty: Easy6
servings20
minutes30
minutes620
kcalBerry’s Master Recipe for Victoria sandwich cake from Cookery Course (2015), this is her most fully annotated version, with “Key to Success” notes at every stage explaining what goes wrong and why. Serves 6, uses deep loose-bottomed tins, and includes her most detailed Prepare Ahead and Freeze guidance.
Ingredients
- For the sponge:
225g (8oz) butter (room temperature) or vegetable spread (at least 70% fat), plus extra for greasing
225g (8oz) caster sugar
225g (8oz) self-raising flour
2 level teaspoons baking powder
4 large eggs
- For the filling and topping:
About 4 tablespoons raspberry or strawberry jam
A little caster sugar, for sprinkling
Directions
- Prepare the tins: Preheat the oven to 180°C (fan 160°C/350°F/Gas 4). Cut 2 baking parchment circles, grease the sandwich tins with butter or vegetable spread, and put the circles inside. Grease the circles. Key to Success: The tins must be greased evenly, or the cakes will not rise properly.
Make the mixture: Place the butter or vegetable spread in a large bowl, then add the caster sugar, self-raising flour, and baking powder. Crack the eggs one at a time and add to the bowl. Using the electric mixer on a slow speed, beat for 2 minutes, or until smooth. The mixture will be soft enough to drop off the beaters when you lift them up. Key to Success: Always use exactly the right amount of baking powder; too much will make the cake dry. Be careful not to over-mix. - Level and bake: Divide the mixture equally between the prepared cake tins and level the surfaces with a palette knife or spatula. Bake both cakes for 20–30 minutes. When done, they will shrink away from the sides and the tops will spring back if pressed. Cool for 2 minutes, then loosen the edges with a knife. Key to Success: Do not be tempted to open the oven door before 20 minutes, or the cakes will sink, and never over-bake, or they will become hard.
- Turn out: After about 10 minutes, push the cakes out of their tins on their bases, invert them onto a thick tea towel, and remove the bases. Cool the cakes the right way up on a rack.
- Assemble: Soften the jam with a palette knife. When the cakes are cold, remove the lining papers and invert one cake layer onto a plate. Spread with jam, put the other layer on top, and sprinkle with caster sugar.
Notes
- Calculation: 225g butter (1,613 kcal) + 225g caster sugar (871 kcal) + 4 large eggs (312 kcal) + 225g self-raising flour (776 kcal) + 60g jam (150 kcal) = 3,722 kcal ÷ 6 servings = 620 kcal. Calculated using 6 servings as stated. Caster sugar topping excluded as negligible. The book also provides its own figure: 511 kcal per serving, calculated at 6 servings from a different fat source (vegetable spread). Both figures are included; the difference reflects butter vs. spread.
FAQs
What does “spring back” mean and how do I test it correctly?
“Spring back” means the sponge surface returns to its original position immediately after being pressed, without leaving a dent. To test it, press the very centre of the cake with the pad of one finger, not your fingertip, using only the lightest possible pressure. If the surface bounces back within a second, the cake is done; if the dent stays, it needs more time. Berry pairs this with the shrink-away test in her Cookery Course instructions, where the sponge visibly pulls away from the tin sides, so you have two signals rather than one.
Can I open the oven door while a Victoria sponge is baking?
Not before 20 minutes. Berry is direct in her Cookery Course Key to Success: “Do not be tempted to open the oven door before 20 minutes, or the cakes will sink.” The reason is structural: in the first 15 to 20 minutes, the batter is still liquid at its core and the rising structure hasn’t set. Cold air from an open door drops the internal temperature enough to collapse the air bubbles before they’re locked in place by the cooked proteins. After 20 minutes, a quick check is fine, but close the door gently, because slamming it can still cause a partially set sponge to dip.
How much baking powder should I use in a Victoria sponge?
Exactly 2 level teaspoons for the 225g recipe. Berry flags this in her Cookery Course Key to Success: “Always use exactly the right amount of baking powder; too much will make the cake dry.” A heaped teaspoon instead of a level one adds roughly 30–40% more baking powder, which causes the sponge to rise too quickly, set unevenly, and develop a dry, slightly bitter crumb. Self-raising flour already contains raising agents, so the additional baking powder is a precise top-up, not a general leavening, which is why the measure matters more here than in recipes that use plain flour alone.
How do I grease the tins properly so the cakes rise evenly?
Berry’s Key to Success in Cookery Course states plainly that “the tins must be greased evenly, or the cakes will not rise properly.” The practical method is to use a piece of greaseproof paper or a pastry brush to push a thin, consistent layer of butter or vegetable spread into every part of the tin, including right up to the rim. Miss a patch and the batter will grip the ungreased metal rather than rising freely past it, creating an uneven edge. Greasing the parchment circle once it’s in the tin is also specified in this recipe, because an ungreased lining paper can stick to the base of the sponge and tear it when you turn it out.
How long does a Victoria sponge keep and can I freeze it?
Berry’s Cookery Course is the most specific of her books on this: best on the day of baking, but it keeps in an airtight container for 1–2 days. For longer storage, freeze the unfilled sponge layers separately with the base papers still on, wrapped in foil inside a freezer bag, for up to 3 months. The detail that matters is the base paper: leaving it on protects the sponge surface from freezer contact and means you have a clean surface to assemble from once it’s thawed. Defrost at room temperature for two to three hours, assemble with fresh jam, and serve the same day.