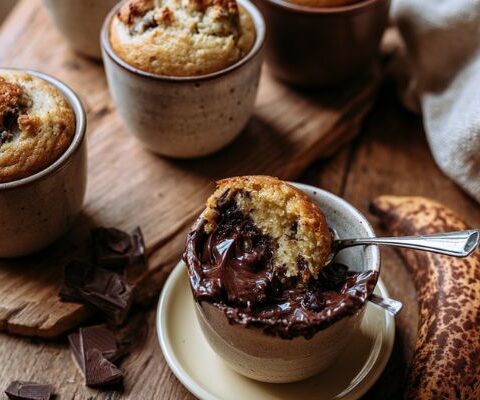
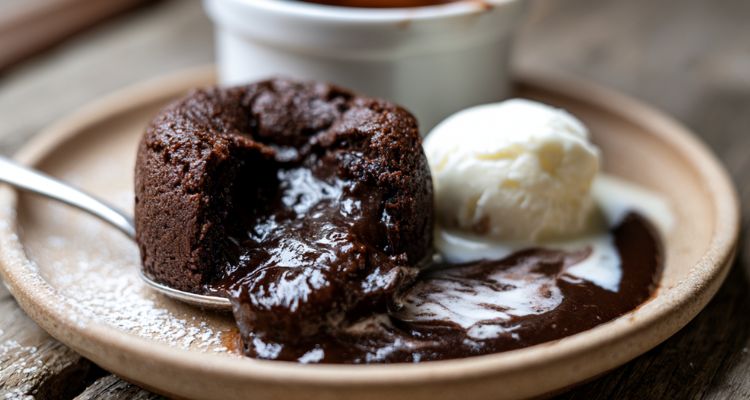
Jamie Oliver’s chocolate fondant is a hot chocolate pudding with a molten centre, made with 70% dark chocolate, butter, sugar, eggs, flour and vanilla, baked at 180°C (Gas 4) for about 12 minutes. The recipe serves 4 and takes 25 minutes in total, with just 6 ingredients.
Oliver published this as a step-by-step feature on jamieoliver.com with photographs of each stage. His intro sets the tone: “Check that your oven temperature is spot-on before these little puds go in. Timing is also crucial, and will be affected by the thickness and depth of your ramekins.” He also says to make an extra one for backup if it’s a special occasion, because “if all goes well, you’ll have a spare (guard it well).”
The chocolate goes in melted and cooled, not chopped and folded. Oliver uses a bain-marie to melt 175g of 70% dark chocolate, then lets it cool slightly before it goes anywhere near the eggs. If the chocolate is too hot when it hits the egg mixture, it scrambles the eggs and the fondant comes out grainy instead of smooth.
Jamie Oliver Chocolate Fondant
Course: DessertCuisine: BritishDifficulty: Easy4
servings15
minutes10
minutes420
kcal27
minutesOliver gives four flavour twists at the bottom of this recipe: caramel with frozen dulce de leche, caramel and crushed hazelnuts, fresh berries pushed into the centre, and chocolate espresso with 25ml of cooled coffee stirred through the batter.
Ingredients
25g unsalted butter (at room temperature), plus extra for greasing
175g quality dark chocolate (70%)
75g caster sugar
2 large free-range eggs
25g plain flour
½ teaspoon vanilla extract
Directions
- Preheat: Set the oven to 180°C/350°F/Gas 4. Grease 4 ramekins generously with softened butter.
- Melt the chocolate: Break up the chocolate and melt in a bain-marie (a heatproof bowl set over a pan of gently simmering water). Remove from the heat and leave to cool slightly.
- Make the batter: Cream the butter and sugar together until light and fluffy. Add the eggs and beat well. Fold in the melted chocolate, the flour and the vanilla extract until just combined.
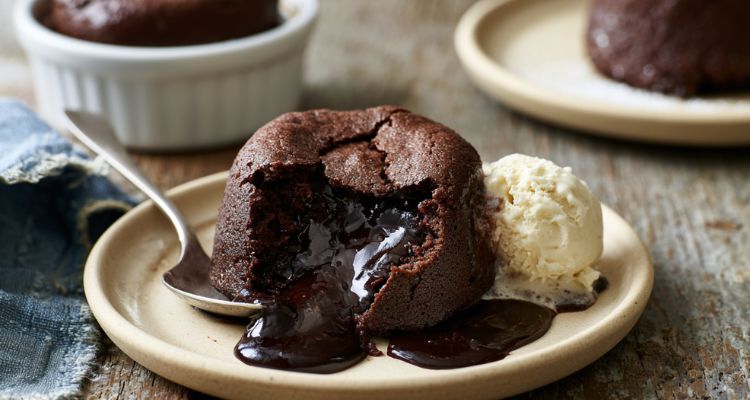
- Fill and bake: Pour the mixture into the prepared ramekins and bake for 10 to 12 minutes, or until the fondants have risen with a set edge and a soft, wobbling centre.
- Serve: Turn out immediately onto warmed plates and tuck in. Serve with vanilla ice cream or crème anglaise.
Notes
- Calories: 25g butter (179) + 175g dark chocolate 70% (956) + 75g sugar (290) + 2 eggs (156) + 25g flour (91) = 1,672 ÷ 4 = 420 kcal per fondant
FAQs
Is this the same as a chocolate fondant pudding?
Same thing, different names. A chocolate fondant, a hot chocolate fondant and a chocolate fondant pudding all describe a small baked chocolate dessert with a set sponge outside and a molten centre inside. Oliver calls them “little puds” in his intro, which is about as British as it gets. Some menus call them lava cakes, which is the American name for the same dish.
The key difference between a fondant and a regular chocolate pudding is the bake time. Oliver’s Chocolate Pots from his Christmas Cookbook bake for 25 minutes in a water bath and set all the way through. These fondants bake for barely 12 minutes with no water bath, which is why the centre stays liquid. Less time in the oven means more molten chocolate in your mouth.
Can I make a white chocolate fondant with this recipe?
Oliver doesn’t include a white chocolate variation in his four flavour twists, and there’s a reason for that. White chocolate has no cocoa solids, just cocoa butter, sugar and milk powder. It melts at a lower temperature and sets differently, so the batter behaves unpredictably in the oven — the centre can either stay completely liquid or set solid, with nothing in between.
If you want to try it, swap the 175g dark chocolate for the same weight of quality white chocolate and reduce the sugar to 50g since white chocolate is already much sweeter. Add the zest of half a lemon to cut through the sweetness. Drop the bake time to 8 to 9 minutes and watch them closely, because white chocolate burns faster than dark.
How do I make Oliver’s caramel fondant twist?
Oliver’s method is clever. He freezes 4 teaspoons of dulce de leche or toffee sauce in an ice cube tray for 2 to 3 hours until they’re solid. When you fill the ramekins, stop halfway, drop a frozen cube of dulce de leche into the centre, then cover with the remaining batter and bake as normal.
The frozen caramel melts during baking and creates a second molten layer inside the chocolate fondant — so you get liquid chocolate and liquid caramel in the same spoonful. His caramel and nut version adds half a teaspoon of crushed hazelnuts on top of the frozen caramel before covering with batter. I’ve tried both and the hazelnut version is the better one because the crunch breaks up the double-gooey centre.
Can I make these chocolate fondants ahead of time?
You can make the batter up to 24 hours ahead, pour it into the greased ramekins, cover with cling film and refrigerate. Bake them straight from the fridge, adding 2 to 3 extra minutes to the cooking time because the cold batter takes longer to heat through to that molten centre.
Oliver’s berry variation works particularly well made ahead, because the raspberries or cherries pushed into the centre have time to release a little juice into the batter overnight, which intensifies the fruit flavour. His espresso version (half a tablespoon of extra flour and 25ml cooled espresso stirred into the batter) also improves overnight as the coffee flavour deepens.
Why does Oliver say to make an extra fondant for backup?
Because the difference between a perfect fondant and a failed one is about 60 seconds of bake time. Underbake by a minute and the whole thing collapses when you turn it out, leaving you with chocolate soup on a plate. Overbake by a minute and the molten centre sets solid, giving you a small chocolate cake instead of a fondant.
Oliver’s advice is practical: “If you’re making them for a special occasion, it’s a good idea to make an extra one for back-up.” Cook the backup at the same time as the others. If the first four turn out perfectly, you eat the spare. If one fails, you have a replacement ready. It’s the kind of tip that only comes from someone who’s served these at dinner parties and had one go wrong at the worst possible moment.
How do I know when the fondant is done?
Oliver says to “use your instincts if your ramekins are bigger or smaller than suggested,” which isn’t especially helpful the first time you make them. The visual cues are more reliable: the fondant should have risen about 1cm above the rim of the ramekin, the top should be set and slightly cracked, and the edges should have pulled away from the sides just enough that you can see a thin gap.
Give the ramekin a gentle shake. If the centre wobbles like a just-set jelly, it’s ready. If the whole surface moves as one piece, it needs another minute. If nothing wobbles at all, you’ve gone too far and the centre has set. Turn them out onto warmed plates immediately — every second they sit in the hot ramekin, the residual heat is cooking that molten centre further.